

PowerShell Deploy 本地项目直接部署远程服务器,支持 IIS 站点、Windows 服务、文件发布
安装
把此代码下载或通过 git clone 到本地,然后在目录下面以管理员方式运行 Install.ps1
git clone https://github.com/ZEQP/ZEQP-PSDeploy.git
cd .\ZEQP-PSDeploy
.\Install.ps1
创建/关闭 PSSession
通过弹出框输入密码:
$Credential = Get-Credential -UserName "Administrator" -Message "请输入部署服务器的用户名和密码"
# 默认用 HTTP-5985 端口
$Session = New-PSSession -ComputerName 10.100.12.100 -Credential $Credential
# 中间过程处理 TODO
# 处理完成后关闭连接
Remove-PSSession -Session $Session
直接创建 PSSession:
$Password = ConvertTo-SecureString "{PassWord}" -AsPlainText -Force
$Credential = New-Object System.Management.Automation.PSCredential("Administrator", $Password)
# 默认用 HTTPS-5986 端口
$SessionOption = New-PSSessionOption -SkipCACheck -SkipCNCheck -SkipRevocationCheck
$Session = New-PSSession -ComputerName 10.100.12.100 -Port 5986 -Credential $Credential -UseSSL -SessionOption $SessionOption
# 中间过程处理 TODO
# 处理完成后关闭连接
Remove-PSSession -Session $Session
自动编译然后发布到指定服务器 IIS 站点
示例为 dotnet 后端项目,实际支持任意语言项目,只用写特定语言的编译发布命令就行:
Start-DeployIIS -Session $Session -WebSiteName MyAPPWebSite -WebSitePort 8080 -ScriptBlock {
    param($o) dotnet publish -o $o -c "Debug" -f net8.0 --no-self-contained -v m --nologo /p:EnvironmentName=Test
} -OutputPath .\bin\publish\ -RemotePath "D:\Publish\"
前端项目
示例为 nodejs 的项目用 yarn 编译,实际支持任意语言项目,只用写特定语言的编译发布命令就行:
Start-DeployIIS -Session $Session -WebSiteName MyUIWebSite -WebSitePort 8081 -ScriptBlock {
    yarn run build:test
} -OutputPath .\dist\ -RemotePath "D:\Publish\"
自动编译然后发布为服务
Start-DeploySvc -Session $Session -ServiceName MyAPPService -BinaryName "MyAPPService.exe --environment Test" -ScriptBlock {
    param($o) dotnet publish -o $o -c "Debug" -f net8.0 --no-self-contained -v m --nologo -p:EnvironmentName=Test
} -OutputPath .\bin\publish\ -RemotePath "D:\Publish\"
直接部署文件
直接把 DeployFile 目录复制到服务器 Publish 目录下面,实际路径为 D:\Publish\DeployFile:
Start-DeployFile -Session $Session -Path D:\DeployFile\ -RemotePath "D:\Publish" -Compress
直接把 DeployFile 目录下所有文件复制到服务器 D:\Publish\DeployFile 目录下面:
Start-DeployFile -Session $Session -Path D:\DeployFile\* -RemotePath "D:\Publish\DeployFile" -Compress
示例
直接部署 IIS 站点
在目录下创建 PowerShell 脚本文件 Deploy.ps1:
$Credential = Get-Credential -UserName "Administrator" -Message "请输入部署服务器的用户名和密码"
$SessionOption = New-PSSessionOption -SkipCACheck -SkipCNCheck -SkipRevocationCheck
$Session = New-PSSession -ComputerName 10.100.12.100 -Port 5986 -Credential $Credential -UseSSL -SessionOption $SessionOption
Start-DeployIIS -Session $Session -WebSiteName MyAPPWebSite -WebSitePort 8050 -ScriptBlock {
    param($o) dotnet publish -o $o -c "Release" -f net8.0 --no-self-contained --no-restore -v m --nologo /p:EnvironmentName=Production
} -OutputPath .\bin\publish\ -RemotePath "D:\Publish\"
Remove-PSSession -Session $Session
直接部署 Windows 服务
在目录下创建 PowerShell 脚本文件 Deploy.ps1:
$Credential = Get-Credential -UserName "Administrator" -Message "请输入部署服务器的用户名和密码"
$SessionOption = New-PSSessionOption -SkipCACheck -SkipCNCheck -SkipRevocationCheck
$Session = New-PSSession -ComputerName 10.100.12.100 -Port 5986 -Credential $Credential -UseSSL -SessionOption $SessionOption
Start-DeploySvc -Session $Session -ServiceName MyAPPService -BinaryName "MyAPPService.exe --environment Production" -ScriptBlock {
    param($o) dotnet publish -o $o -c "Release" -f net8.0 --no-self-contained --no-restore -v m --nologo -p:EnvironmentName=Production
} -OutputPath .\bin\publish\ -RemotePath "D:\Publish\"
Remove-PSSession -Session $Session
批量部署多个服务
在目录下创建 PowerShell 脚本文件 Deploy.ps1:
$Credential = Get-Credential -UserName "Administrator" -Message "请输入部署服务器的用户名和密码"
$SessionOption = New-PSSessionOption -SkipCACheck -SkipCNCheck -SkipRevocationCheck
$Session = New-PSSession -ComputerName 10.100.12.100 -Port 5986 -Credential $Credential -UseSSL -SessionOption $SessionOption

# 进入 MyAPPWebSite 目录下编译
Set-Location -Path $MyAPPWebSitePath
Start-DeployIIS -Session $Session -WebSiteName MyAPPWebSite -WebSitePort 8050 -ScriptBlock {
    param($o) dotnet publish -o $o -c "Release" -f net8.0 --no-self-contained --no-restore -v m --nologo /p:EnvironmentName=Production
} -OutputPath .\bin\publish\ -RemotePath "D:\Publish\"

# 进入 MyAPPService 目录下编译
Set-Location -Path $MyAPPServicePath
Start-DeploySvc -Session $Session -ServiceName MyAPPService -BinaryName "MyAPPService.exe --environment Production" -ScriptBlock {
    param($o) dotnet publish -o $o -c "Release" -f net8.0 --no-self-contained --no-restore -v m --nologo -p:EnvironmentName=Production
} -OutputPath .\bin\publish\ -RemotePath "D:\Publish\"

Remove-PSSession -Session $Session
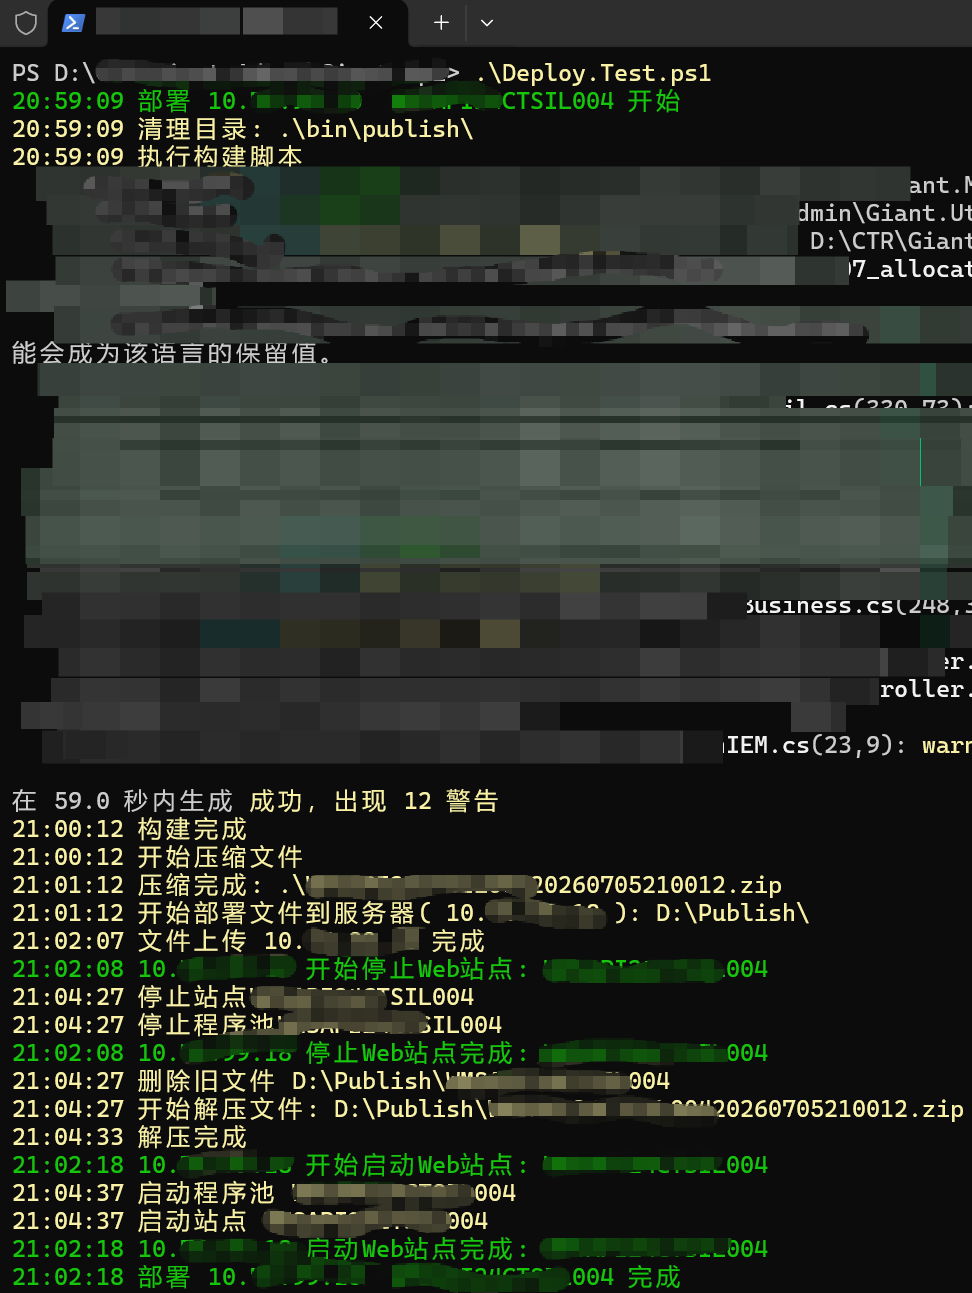
方法描述
Start-DeployIIS
Start-DeployIIS 用于本地构建并自动部署到远程 IIS 网站,参数说明如下:
-Session:远程 PowerShell 会话对象,必须已打开并连接到目标服务器。脚本会在该会话中创建、停止、启动 IIS 站点并上传 ZIP 文件。-ScriptBlock:本地构建脚本块,用于生成部署产物。ScriptBlock 内通常使用param($o)接收输出目录,并将构建结果写入-OutputPath指定的目录。-OutputPath:本地输出目录。脚本会检查路径是否存在,不存在则创建,存在则清空目录后执行构建,并将输出文件压缩为 ZIP 包。-WebSiteName:目标 IIS 网站名称。脚本会尝试查找该站点,若不存在则新建;部署时会将内容解压到远程目录中的同名子目录。-WebSitePort:目标 IIS 网站端口,用于创建新站点时绑定端口。若站点已存在,则不会修改现有绑定。-RemotePath:目标服务器的远程发布目录,默认值为D:\Publish\。ZIP 文件会上传到此目录,然后在目标服务器上解压到RemotePath\WebSiteName。
脚本执行流程:
- 检查并准备本地
OutputPath。 - 执行
ScriptBlock生成部署文件。 - 压缩
OutputPath内容为 ZIP。 - 上传 ZIP 到远程服务器
RemotePath。 - 查找或创建指定
WebSiteName的 IIS 站点。 - 停止网站、清理旧文件、解压新文件,并重新启动网站。
Start-DeploySvc
Start-DeploySvc 用于本地构建并自动部署到远程 Windows 服务,参数说明如下:
-Session:远程 PowerShell 会话对象,必须已打开并连接到目标服务器。脚本会在该会话中创建、停止、启动服务并上传 ZIP 文件。-ScriptBlock:本地构建脚本块,用于生成部署产物。ScriptBlock 内通常使用param($o)接收输出目录,并将构建结果写入-OutputPath指定的目录。-OutputPath:本地输出目录。脚本会检查路径是否存在,不存在则创建,存在则清空目录后执行构建,并将输出文件压缩为 ZIP 包。-ServiceName:目标 Windows 服务名称。脚本会尝试查找该服务,若不存在则新建;部署时会将内容解压到远程目录中的同名子目录。-BinaryName:服务可执行文件名称及启动参数,例如"Giant.DI.exe --environment Test"。该值用于创建服务时的 ImagePath。-RemotePath:目标服务器的远程发布目录,默认值为D:\Publish\。ZIP 文件会上传到此目录,然后在目标服务器上解压到RemotePath\ServiceName。
脚本执行流程:
- 检查并准备本地
OutputPath。 - 执行
ScriptBlock生成部署文件。 - 压缩
OutputPath内容为 ZIP。 - 上传 ZIP 到远程服务器
RemotePath。 - 查找或创建指定
ServiceName的 Windows 服务。 - 停止服务、清理旧文件、解压新文件,并重新启动服务。
Start-DeployFile
Start-DeployFile 用于将本地文件或目录直接发布到远程服务器,可选压缩上传并支持本地/远程前后置脚本,参数说明如下:
-Session:远程 PowerShell 会话对象,必须已打开并连接到目标服务器。该参数用于远程文件复制和执行远程脚本。-Path:本地文件或目录路径。可以是目录、文件或通配符路径(例如D:\DeployFile\*)。脚本会在本地验证该路径是否存在。-RemotePath:目标服务器上的发布目录。上传时会将文件复制到该目录;如果目录不存在,脚本会自动创建。-Compress:是否先将本地文件/目录压缩为 ZIP 后再上传。启用后,会上传压缩包并在远程服务器上解压。-ScriptLocalStart:本地前置脚本块,会在文件上传前执行,通常用于准备或清理-Path指定目录。-ScriptLocalEnd:本地后置脚本块,会在文件上传和远程脚本执行后执行,通常用于本地清理或记录日志。-ScriptRemoteStart:远程前置脚本块,会在文件上传到远程目录后执行,适用于远程初始化或预处理。-ScriptRemoteEnd:远程后置脚本块,会在文件上传完成并解压后执行,适用于启动服务、修改权限或后续处理。
脚本执行流程:
- 验证本地
-Path是否存在。 - 执行可选本地前置脚本
-ScriptLocalStart。 - 如果启用
-Compress,则先将指定路径压缩为 ZIP。 - 在远程服务器上创建或校验
-RemotePath。 - 上传文件或 ZIP 到远程目录。
- 可选执行远程前置脚本
-ScriptRemoteStart。 - 如果启用了压缩,远程解压 ZIP 文件到目标目录。
- 可选执行远程后置脚本
-ScriptRemoteEnd。 - 可选执行本地后置脚本
-ScriptLocalEnd。
前置条件
连接到指定的服务器,是运用了 PowerShell 的远程管理功能。此功能需要在对应服务器开启 PowerShell 远程管理功能(Windows 服务里面有个 WinRM 的服务,显示名称:Windows Remote Management (WS-Management))。服务器需要打开防火墙入站规则“WinRM 远程管理”,HTTP 端口为 5985,HTTPS 端口为 5986。
# 先把网络设备为专用网络
Get-NetConnectionProfile
# 修改单个网络为专用网络
Set-NetConnectionProfile -Name "{指定网络名称}" -NetworkCategory Private

# 修改所有网络为专用网络
# Get-NetConnectionProfile | Set-NetConnectionProfile -NetworkCategory Private

# 在远程服务器运行此命令(用 PowerShell 以管理员方式运行)
Enable-PSRemoting
# 也可以用下面的参数,忽略网络环境检查,不管内外网环境
Enable-PSRemoting -SkipNetworkProfileCheck -Force

# 信任指定 host,* 为所有(本机和服务器都运行)
Set-Item WSMan:\localhost\Client\TrustedHosts -Value *
增加 HTTPS 监听(需要证书)(可选):
$MachineName = [System.Environment]::MachineName
$Cer = Get-ChildItem -Path Cert:\LocalMachine\My\ | Where-Object {$_.Subject -like "CN=$MachineName*"}
$Thumbprint = $Cer[0].Thumbprint
New-Item WSMan:\localhost\Listener\ -Transport HTTPS -Address * -CertificateThumbPrint $Thumbprint

# 打开 WinRM HTTPS 的 5986 端口
New-NetFirewallRule -Name "WinRM HTTPS 5986" -DisplayName "WinRM HTTPS 5986" -Action Allow -Protocol TCP -LocalPort 5986 -Direction Inbound




暂无评论,来抢沙发吧~